Showing posts with label tips n trick. Show all posts

10 August 2012

cara mengatasi smartfren e781a device not found or removed

Kadang kala ketika kita mengkoneksikan smartfren e781a ke laptop / pc mengalami kendala driver tidak terdeteksi oleh system / device not found or removed. karena disk installer evdo driver yang berjalan secara autorun sehingga driver tidak terdeteksi. untuk itu agar driver evdo modem terdeteksi maka kita harus mematikan dahulu disk installer evdo driver. caranya adalah sebagai berikut:


klik di taskbar kanan bawah, cari gambar usb yang dicentang, lalu klik kiri.


setelah itu pilih eject cd drive evdo driver


done, dan lihat hasilnya. bila tidak terdeteksi, re-run aplikasi evdo modem.

07 June 2012

cara memperbaiki smartfren e781a sering restart

Bagi anda yang mempunyai hp smartfren e781a dan sering restart apabila masuk ke opera mini. itu dikarenakan memori internal yang kapasitasnya overload. coba dicek memorinya jangan sampai lebih dari 90%. 
meski anda telah merestore opera mini, tetap saja akan restart, karena memori internal mencakup ram dan rom system. dan apabila kapasitasnya penuh maka memori system akan kehabisan. 
lakukanlah pemindahan file memori internal ke memori external dengan cara copy paste atau salin / potong dan tempel.

perlu diingat kamera yang ada di smartfren e781a mempunyai resolusi 2mp. dan file yang tersimpan bisa mencapai 500kb, jadi bagi yang suka narsis... hehehe. harap diingat agar menyimpan foto anda ke default memori external / micro sd card. 

pengiriman bluetooth juga agar di setting default ke memori external, agar memori internal tidak overload. itu penjelasan saya, semoga bermanfaat.

CARA RESTORE OPERA MINI DISINI

15 July 2011

motorola Droid 2™ tips and tricks

the prestigious title of Time Magazine's gadget of the year. The Motorola DROID was nearly a full head-on gamble for the one time dominant company in the mobile industry, but it appeared that they didn't require luck due to the fact that the DROID was such a big hit among consumers. Not only did it reinvigorate Motorola, but as a whole, it provided the sudden movement needed to showcase the power and depth that Android has to offer to a broad range of consumers.

Fast forward to the present and we're now being treated to its eventual successor, the aptly named Motorola DROID 2, which is coming into the market at a time when a myriad of other Android powered smartphones have shown their prowess among the competition. Despite finding a handful of improvements in the hardware and software side over its predecessor, the Motorola DROID 2 is aiming to continue its stance of DROID.


motorola Droid 2™ tips and tricks, specifications


General:

2G Network CDMA 800 / 1900

3G Network CDMA2000 1xEV-DO

Announced 2010, August

Status Available.

Released 2010, August

CPU 1 GHz processor

Messaging SMS (threaded view), MMS, Email, IM, Push Email

Browser HTML

Radio No

Games Yes + downloadable

Colors Black

GPS Yes, with A-GPS support

Java Yes, via Java MIDP emulator

Battery Standard battery, Li-Po 1400 mAh

Stand-by Up to 315 h

Talk time Up to 10 h

Weight 1.49 W/kg (head) 1.50 W/kg (body)


Size:

Dimensions 116.3 x 60.5 x 13.7 mm

Weight 169 g


Display:

Type TFT capacitive touchscreen, 16M colors

Size 480 x 854 pixels, 3.7 inches


Sound:

Alert types Vibration; MP3, WAV ringtones

Loudspeaker Yes

3.5mm jack Yes


Memory:

Phonebook Practically unlimited entries and fields, Photo call

Call records Practically unlimited

Internal 8 GB

Card slot microSD, up to 32GB, 8GB included, buy memory


Data:

GPRS No

EDGE No

3G Rev. A, up to 3.1 Mbps

WLAN Wi-Fi 802.11 b/g/n, DLNA, Wi-Fi hotspot

Bluetooth Yes, v2.1 with A2DP

Infrared port No

USB Yes, microUSB v2.0


Camera:

Primary 5 MP, 2592х1944 pixels, autofocus

Features Geo-tagging, face detection, image stabilization

Video Yes, D1 (720x480 pixels) @ 30 fps

Secondary No

Features OS Android OS, v2.2 (Froyo)


Features:

- QWERTY keyboard

- Multi-touch input method

- Accelerometer sensor for UI auto-rotate

- Proximity sensor for auto turn-off

- SNS integration

- Digital compass

- MP3/WAV/WMA/AAC+ player

- MP4/WMV/H.263/H.264 player

- Google Search, Maps, Gmail,

- YouTube, Google Talk

- Document viewer

- Photo viewer/editor

- Organizer

- Adobe Flash 10.1

- Voice memo/dial/commands

- Predictive text input (Swype)


motorola Droid 2™ tips and tricks, extending battery life


Things you should know about charging your battery.


New batteries are not fully charged. Plug the battery charger into your phone and an electrical outlet. Your phone might take several seconds to start charging the battery.


Tips:


* The battery charger shipped with this device is a high rate charger specifically designed for your DROID 2.


* Other chargers might take longer to charge your battery, cause your calls to fail during charging, or cause your phone to continuously power cycle.


* You can charge your phone via USB cable but this charging time will vary based on computer specifications.


* If battery is low, your phone will not immediately power up when you connect it to a computer via USB. Depending on how low the battery is, it may take up to 30 minutes for the phone to get enough power to powerup.


* Some Marketplace applications can drain battery unexpectedly with data requests and processes running in the background. Deleting widgets alone for these applications will not stop the application from pulling the data; the application iteself must be uninstalled or killed temporarily with a Task Manager or App Killer.


There are two built in tools to assist you in optimizing battery life.


1. Power control widget


The Power Control Widget gives you a quick snapshot of some of the tools that may be draining your battery. The widget can turn off / on several features: Wi-Fi, Bluetooth, Location (GPS), Synchronization, and also adjust Display brightness


To add the Power control widget:

From the home screen, touch Menu > (+) Add > Android Widgets > Power Control


2. Battery Manager Feature


The Battery Manager feature provides you with a real time view of what features or applications are using the highest percentage of your battery. It can also be used to select an automatic or manually-selected battery saving profile.


To access Battery Manager:

From the home screen, touch Menu > Settings > Battery Manager


* Battery Profile: 3 automatic profiles - Performance (highest user of battery power), Smart (medium setting), and Battery Saver Mode (uses least amount of battery power)


* Battery Profile Options: Manually select certain options to reduce battery usage.


* Battery Use: provides current view of what features or applications are using the highest percentage of your battery


Tips to extend battery life:


* Select a shorter backlight duration


* Lower the display brightness


* Use the AC adapter to charge your phone whenever possible


* Turn Bluetooth off when not in use


* Turn Wi-Fi off when not in use


* Certain applications may be drawing excessive battery power. If you are experiencing shorter battery life after downloading an application try uninstalling the application.


* Close any third party applications running in the background


* Playing music, videos and viewing images in your phone will affect your battery life.


General Battery use & safety


* Motorola recommends you always use Motorola-branded batteries and chargers. The warranty does not cover damage caused by non-Motorola batteries and/or chargers.


Caution: Use of an unqualified battery or charger may present a risk of fire, explosion, leakage, or other hazard. Improper battery use, or use of a damaged battery, may result in a fire, explosion, or other hazard.


* Your battery can be charged without it being fully depleted, and can be charged every day if desired.


* Battery usage by children should be supervised.


* Important: Motorola mobile devices are designed to work best with qualified batteries. If you see a message on your display such as Invalid Battery, Invalid Charger or Unable to Charge, take the following steps:


* Remove the battery and inspect it to confirm that it bears a Motorola "Original Equipment" hologram;

- If there is no hologram, the battery is not a qualified battery

- If there is a hologram, replace the battery and retry charging it

- If the message remains, contact a Motorola Authorized Service Center


* New batteries or batteries stored for a long time may take more time to charge.


* Charging precautions: When charging your battery, keep it near room temperature. Never expose batteries to temperatures below 0°C (32°F) or above 45°C (113°F) when charging. Always take your mobile device with you when you leave your vehicle


* When storing your battery, keep it in a cool, dry place.


* It is normal over time for battery life to decrease, and for the battery to exhibit shorter runtime between charges or require more frequent or longer charging times. Motorola batteries are designed to last between 350-700 charge/discharge cycles at room temperature. This amounts to approximately a year to a year and a half of battery use for most people.


* Avoid damage to battery and mobile device. Do not disassemble, open, crush, bend, deform, puncture, shred, or submerge the battery or mobile device. Avoid dropping the battery or mobile device, especially on a hard surface. If your battery or mobile device has been subjected to such damage, take it to a local service center before using. Do not attempt to dry it with an appliance or heat source, such as a hair dryer or microwave oven.


* Use care when handling a charged battery-particularly when placing it inside a pocket, purse, or other container with metal objects. Contact with metal objects (such as jewelry, keys, beaded chains) could complete an electrical circuit (short circuit), causing the battery to become very hot, which could cause damage or injury.


motorola Droid 2™ tips and tricks, Inject CDMA


Tutorial Inject SMART On Motorola Droid 2 / Droid 2 Global / Droid X


Tutorial Inject FLEXY On Motorola Droid 2 / Droid 2 Global / Droid X


motorola Droid 2™ tips and tricks, rooting


How to Root Droid 2, or (see easy tutorial with z4root at android-marked)


1. Before we do anything, download Android SDK here and unzip it into a folder called “sdk” under your C:\ directory. (for Windows)


2. Download Droid2Root.rar and unzip it into your SDK / Tools directory as “droid2″.


3. Go to your phone, then browse to Settings -> Applications -> Development then make sure USB debugging is checked “on”.


4. Next, connect your Droid 2 your computer and select “PC Mode”.

Then, a screen should pop up saying if you want to install the Motorola Driver. Say yes and install this Motorola driver.


5. After it installs, you can double-check that the drive has installed correctly by checking your Device Manager, Mot Composite ADB Interface should surface.


6. Next, let’s open up a command prompt window by typing “cmd” under search bar.


7. In the command prompt, browse to the SDK\Tools directory like this:


cd \sdk\tools


8. Then type “adb devices” and if your device shows up, we are ready to root the phone


C:\sdk\tools\adb devices


9. Next type each of the following lines and hit Enter:


adb push droid2\Superuser.apk /sdcard/Superuser.apk

adb push droid2\su /sdcard/su

adb push droid2\busybox /sdcard/busybox

adb push droid2\rageagainstthecage-arm5.bin /data/local/tmp/rageagainstthecage-arm5.bin


10. Let’s enter the Droid 2 shell:


adb shell


11. Then run the rooting file:


cd data/local/tmp

chmod 0755 rageagainstthecage-arm5.bin

./rageagainstthecage-arm5.bin


12. After the last line, you can wait like a minute until you get back to the command prompt.


13. Type the following:


adb kill-server

adb devices

adb shell


14. Verify you have a # prompt instead of a $ sign here then type the following:


mount -o rw,remount -t ext3 /dev/block/mmcblk1p21 /system

cp /sdcard/Superuser.apk /system/app/Superuser.apk

cp /sdcard/su /system/bin/su

cp /sdcard/busybox /system/bin/busybox

chmod 4755 /system/bin/su

chmod 4755 /system/bin/busybox

mount -o ro,remount -t ext3 /dev/block/mmcblk1p21 /system


exit


15. Next reboot your Droid 2.


16. After your Droid 2 reboots, enter the ADB shell again:


adb shell


17. Then type:


su


18. Immediately go to your phone and Superuser app should ask you so select “Allow”.


19. Enjoy, your Droid 2 now has been officially rooted!


motorola Droid 2™ tips and tricks


reserved


motorola Droid 2™ tips and tricks


reserved


05 November 2010

restore opera mini on ZTE C261 and HAIER C700

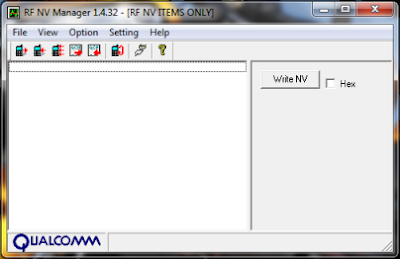
After fixed ZTE C261 factory test mode (FTM) on the LCD, automated phone can not be in use. that mean opera mini may occurs on it. you may use easycdma softwares that trial and buy do so. or you may use freeware software like QPST - RF NV manager is used for transfer data to system rom on ZTE C261. you can do it your self for free here.

following solution:

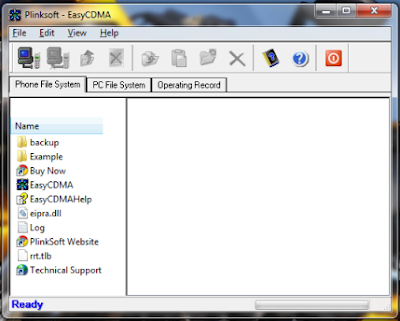
Install EasyCDMA

1. Easy Install CDMA v1.96 input registers (or other version)

2. CDMA Easy Open v1.96> Port Configuration File> Refresh> OK

3. Connect to select phone> OK wait until unreadable files on the phone all

4. Drag and drop to open EasyCDMA explore and open in the extract Haier C700 - ZTE C261 System. then copy each file from extract the results into the existing phone system menu in EasyCDMA. create your own folders if there are files / folders are missing. because in EasyCDMA system that can not be copied from the other, turn off the phone and on again.


Opera Mini is usually normal again


see tutorial video how to fix it from me.

04 November 2010

repair ZTE C261 and HAIER C700 FACTORY TEST MODE

ZTE C261 and HAIER C700 usually trouble in the rom system, Before factory test mode occurs on your phone, you should backup any file system on your phone. because each different phone systems in OperaMini program. how to fix ZTE C261 factory test mode (FTM) on the LCD, automated phone can not be in use. you can do it your self for free here.

following solution:

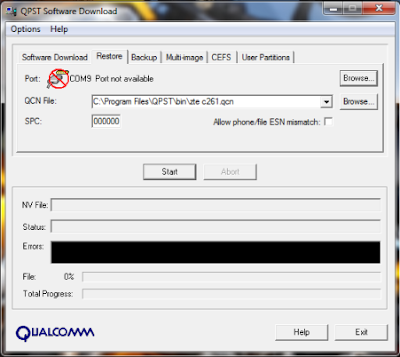
1. Install QPST

2. Open QPST > software download > restore > browse file ZTE C261.qcn > start > finished

When the phone is not detected portcom


open QPST program>> qpst configuration>> ports>> add new port>> adjust the phone port with those in the device manager.

Go check the "Show Serial and USB / QC Diagnostics port only" select com fit in the device manager, then check again "Show Serial and USB / QC Diagnostics port only" and OK and exit. Open the battery and insert it again, Try to turn on the phone usually back to normal again


see tutorial video how to fix it from me

25 September 2010

Tips for buying second hand phone

Here are tips for buying second hand phone nokia:
For the average consumer brands many prefer brand serial nokia 3310, 2100.8250, 3610. In addition to its practical, its menu was easy to understand. No wonder though is not produced anymore and old, including mobile phone consumers are still many who wear them. For that I will give you tips to buy mobile phones in this type, you should consider are:
* Shop / counter sales, from there you can see how the number of products on sale notice on it if the phone is on the counter in large amounts can not be neatly accommodate the store was not a quality modem referred to here is the store that sold accommodate hp by people with hp which may ex-service weight, hp stolen, or deposit from another counter. There term "ngebom" that is, those who sell defective hp then serviced while normal for later be sold to a counter for selling hp in conter until the transaction occurs only lasted 20min. Then the counter for a while and then just check the box on display at the counter, of course, potential buyers who will be harmed.

* Price, which is the main requirement to buy hp used to price at each store would be different for the benchmark price you can see in the classifieds and then match the price in a store if the store is too expensive compared to prices in the classifieds just say " Your price above the market "from which you directly to offer the lowest prices, to the other before you can buy the survey from one store to store to compare the difference in accordance not with quality.

* Warranty, it is important whether it's official guarantee / warranty store, check first whether you will buy a cell phone to his official warranty is still valid. A good store warranty is the warranty period of 3 months.

* Battery, this is a scourge in buying used mobile phones, batteries into the drop (lowbat). There are tricks to find the batteries are still good or not first consider whether the flat surface of the battery / no?. If it does not mean (bubble), it means the batteries are worn should be replaced. The second is to play a voice menu, ringtones, call, vibration, mp3, if we play the menus within 2-5 minutes if the indicator marks a full battery and then you play the menu and suddenly there was a weak battery posts then found out it was worn out batteries.

* LCD, it is also important because this part quite expensive spare parts. While many are cheap but the quality is bad. The trick to know the best quality of LCD is still good or not you can check by looking at the surface of the LCD from left-right side Tasa down if somewhat dark color LCD or the LCD surface is uneven black spot like burning means the LCD is qualitasnya ugly and the former in service. There are other ways to see the best quality of the LCD by pressing the outer upper and lower LCD frame if the press and then release note whether the on-screen menus are still intact or has been blurred.

* See inside the body, look at the mica surface nodes in the keypad look at the cover bolts are visible cracks / still smooth?

* Seal, it's important to see if the hologram nokia seals still in place or have been released if it is disconnected or no longer exists, it means that hp was never in service.

* Signal signal, is the lifeblood of a mobile phone in many cases occurs nokia is no signal to signal damage his replacement spare parts just about 200ribu. But many tricked by serviced by way of lifting the signals for a while ago on sale. To check the signal there is a powerful way of using SYMPATHY card if you use the sympathy if the signal is visible up and down for too long may signal dilapidated. Because the signal is very easy sympathy appeal was arrested in another card.

* The cardboard packing and handbooks, match whether it really dus dus in accordance with the cell phone listed. To match between the boxes and mobile phones can be seen from the IMEI number listed behind the battery and in sampng box if the number is the same skewer. If different could be a mobile phone stolen.

Actually the other tips are still a lot but here I wrote that the core-core just for when you want to buy a secondhand mobile phones can get stuff that does not disappoint despite the warranty from the store. Yet here the quality remains No. 1 that we consider

2. Mobile Warranty

Check whether used or second mobile phone is still under warranty, which is still under warranty typically phones are phones that have more than one year from date of purchase of first-hand, you better choose to buy phones that are still in a state warranty, because more secure state cell phone. However, if the phone warranty period has expired or no longer warranty then you must thoroughly examine the circumstances in the former cell phone that you buy. Make sure also that the phone is not stolen cell phone by looking at the completeness of the used phones, including: the dos and the manual that came with the phone, also complementary accessories that sometimes also included when purchasing a new phone, for example: handfree.

3. Non-warranty or Black Market (BM)

Do not buy a phone that black market (BM), because the risk is often the case jamper on its PCB and if entered the program files (flash) on the original software is often the case "Contact Service" and other damages, and sometimes it is not biased restored so that the phone could not be used at all (Matot)

4. Physical Condition

Check out the conditions and the phone is it still in good condition and most importantly is not disabled. You should also open the phone casing is to ascertain whether the mobile phone has been dropped or had improved (the service). Note the condition of the LCD is still in good condition or has been blurred, also check keoriginalannya. After you check the condition of the phone, then the next turn on the phone, try all the buttons on the keypad if there is a stuck or even not working. Try pressing any number key on the keypad as much as possible and make sure the phone does not hang. Then make sure the functions on the menu all works fine, for example: ringtone, vibration, etc.

5. Signal

Make sure the phone signal is still good. Just compare similar phones with the same network card. If the phone when you try a sudden die alone so be careful, the phone is problematic, this could be due to battery and its weak IC Power

6. IMEI number

Check carefully whether the same all the IMEI number of the phone (usually printed on the back of the phone / behind the battery), the IMEI number on the program your phone (mobile machinery) and the IMEI number listed in phone boxes. This is done is to make you easier to sell this phone back later because the IMEI number has been fit all.

7. Battery

Battery is included on some phones the former certainly has the power of life (life time) is shorter, such as guard time (stand-by) and talk time (talk-time) will be shorter. Another case when the phone battery is new or you buy a new battery. To test the battery then do a call using a phone to call someone or call toll free in the long term.

8. Charger

Notice his charger. Usually that is not original charger its long process, otherwise the original fast charger of his process. Physical charger is heavier than the original that is not original. Longer than the original cable that is not original

31 January 2009

access code setting nam CDMA phone

access code setting nam

hp cdma that support RUIM card[ same like sim card on GSM. this handphones usualy paket from the operator. for changing number of the handphone from inject mode, needed some special trick. start from open the key, upgrade, insert parameter. this the list of setting code NAM:

nokia

set nam :*3001#12345#
version software : *#837# or *#9999#
ESN number : *#92772689#
restart phone : *#75681# or *#75682#
Nokia 3280, 3285, 3580, 3585, 5185, 6185, 8280, etc :
Nam Set: *3001#12345#
Software Version: *#837#
Software Version: *#9999#
Esn Number: *#92772689#
Restart Phone: *#75681#
Restart Phone: *#75682#
Nokia 8887 Nam Programming :
Nam Set: *3001#12345#
Version: *#0000#
Evrc: *#8378#
Esn/Data/Timer: *#92772689#
SID: *#743#
Nokia 8587 Nam Programming :
Nam Set: *#626#7764726#
A-Key: #8159357022#4579# (26 digits)
A-Key: #8159357022#4547# (20 digits)
Version: *#0000#
Version: *#837#
Vocoder: *#3872#
Change language: Menu 5, 3, 1
Change DM mode: *#7678#
Debug Screen: *#8378#
Debug: *#8380#
Field Test Menu: *#83788#
SPC Unlock, Factory Reset :
Full Factory Reset: *#7370#
Resets all settings including non-user changeable items (like SPC)


NOKIA TEST MODE:
51xx, 61xx, 71xx, 3285, 63xx, etc :
1) Turn on the phone. Press *3001#12345#
2) Scroll up to where it says “Field Test” and choose SELECT
3) Highlight “Enable” and choose OK. Turn the phone off then back on.
4) If the test mode screen does not show up press MENU and scroll down to “Field Test” choose SELECT. Press 0 1 then choose OK.
5) Lower left or upper left number is the signal strength.
6) To turn off the test mode press MENU and scroll down to where it says “Field Test” choose SELECT. Press 0 0 and then choose OK.
3360, 6360 :
1) Turn on the phone. Press *3001#12345#
2) Scroll up to where it says “Field Test” and choose SELECT
3) Highlight “Enable” and choose OK. Turn the phone off then back on.
4) If the test mode screen does not show up press MENU and scroll down to “Field Test” choose SELECT. Press 2 1 0 1 then choose OK.
5) Lower left or upper left number is the signal strength.
6) To turn off the test mode press MENU and scroll down to where it says
“Field Test” choose SELECT. Press 2 1 0 0 and then choose OK.


samsung

setting NAM : 47*869#08#9
test mode : *759#813580 or 5809540*45680
exit test mode :02
A key : menu +0, code 25##

Samsung sph-n240, n400, a460, a500, etc:
Nam Set: ##Spc
Test Mode: 47*869#1235
Debug Menu: ##33284,ok
Service Menu: Menu+8+0 (#889)
Reset (Life time, Clear Memory, etc): ##786,ok
A-key: ##2539,ok
Label Selection: ##3882,ok
Label(Home, Work, etc) : **523,ok
NGG Setting (Gateway, etc.): ##2769737,ok
Vocoder: ##8626337,ok
CAI Change: ##7738,ok
Enable TTY: ##889,ok
Samsung sch-411, 611, n105, a100, a300, a2000, etc :

Nam Set: 47*869#08#9
Nam Set: Menu+60
Test Mode: *759#813580
Test Mode: 5809540*45680
A-key: Menu+0, 25##
External Audio: Menu+0, ####
Debug Menu: Menu+8, 0415 or Spc
Debug Menu: Menu+9, 0415 or Spc
Brief NAM Programing: Menu+40,626 (not all version)
LCD Contrast: Menu+45 (not all version)
SIO Mode: Menu+49
SIO Mode: Menu+69
Samsung a300, a530, a610, a620, a660, a670, etc :

Nam Set: Menu, 6, *
Service Menu: Menu, 9, *
Test Mode: 47*68#13580

for inserting number to CDMA phone, need a couple parameter:
NAM1: mobile ID number [MIN], alpha tag, emergency